
The space directly beneath your roof is often treated as little more than a graveyard for holiday decorations and old suitcases. For many homeowners, however, this represents the single largest untapped resource in their entire house. Converting an attic allows you to expand your liveable square footage significantly without sacrificing your backyard or building an entirely new ground-up room. Whether your dream is a secluded home office, a luxurious primary suite, or a vibrant playroom, an attic conversion can deliver exactly what you need while boosting your overall property value.
Transforming this raw, unconditioned structural cavity into a safe, code-compliant, and comfortable living environment requires careful planning. Unlike standard remodeling projects where you are simply updating finishes, an attic conversion fundamentally alters how your home functions structurally, thermally, and mechanically. It requires you to balance strict building regulations with creative design choices to make the new space feel like an intentional, seamless extension of your home.
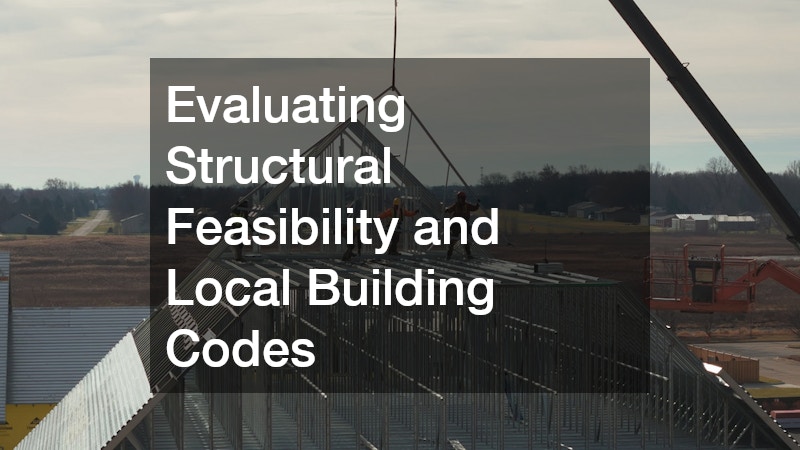
Evaluating Structural Feasibility and Local Building Codes
Assessing the “Rule of 7s” for Headroom
Before you fall in love with a specific design layout, you must determine if your attic can legally be classified as a living space. Building departments enforce strict guidelines regarding ceiling heights to ensure safety and comfort. The standard benchmark used across most jurisdictions is known as the “Rule of 7s.” This regulation dictates that at least 50% of the usable floor area must have a ceiling height of at least 7 feet, and this clear ceiling height must be at least 7 feet wide and 7 feet deep.
Areas where the ceiling height drops below 5 feet typically cannot be counted toward your legal total square footage, though they can still be utilized effectively for low-profile built-in storage or platform beds. If your current roof line falls short of these measurements, your project may require the addition of shed or gable dormers to physically extend the roof upward and create the necessary legal headroom.
Understanding Framing and Permits
The underlying structural skeleton of your roof dictates how complex and costly your conversion will be. Older homes are typically constructed using traditional rafter framing, which leaves a large, naturally open triangular cavity. Modern homes, conversely, are frequently built using prefabricated roof trusses. These interlocking wooden supports occupy the center of the space, meaning you cannot cut through them without causing a structural collapse. Property owners facing this challenge often seek out professional remodeling contractors to analyze the existing load-bearing capacities and install the necessary structural reinforcement.
An attic conversion is a major structural alteration that alters the occupancy classification of your home. Local building codes dictate everything from window sizes to emergency egress requirements and fire blockings. Because you must verify that your home’s foundation can support the extra weight, navigating these regulations is notoriously difficult. This is why many people turn to comprehensive home addition services to manage the zoning checks, submit blueprints, and schedule municipal inspections.
Access, Layout, and Maximizing Square Footage
Designing a Safe and Legal Staircase
To transform an attic into a legal living space, you must replace your pull-down ladder with a permanent, code-compliant staircase. Building codes are highly specific: they generally require a minimum width of 36 inches, a maximum riser height of 7.75 inches, and a minimum of 6 feet 8 inches of headroom along the entire path of travel.
Finding the physical footprint for this staircase on the floor below is often one of the greatest design puzzles of the entire project. The most efficient strategy is to stack the new staircase directly above your existing main-floor stairs, which minimizes the loss of usable living space. If that is structurally impossible, you may have to sacrifice a closet or a portion of a spare bedroom to accommodate the bottom landing of the new staircase.
Zoning Your New Floor Plan for Functionality
Designing an attic layout requires a completely different approach than arranging a standard rectangular room. The sloped ceilings mean that your actual walkable area is much smaller than the physical floor area. Successful designs map out the daily activities of the room based entirely on the ceiling height, placing high-movement activities in the center and stationary elements along the perimeter.
-
Position the bed, desk, or sofa in areas where the ceiling slopes downward, as you primarily sit or lie down in these spots.
-
Keep walkways, showers, and vanity mirrors located strictly along the highest central ridge of the roofline.
-
Build custom low-profile cabinetry directly into the knee walls to turn unusable dead space into valuable storage.
-
Align any new plumbing fixtures directly above existing bathrooms on the lower floors to minimize the length of pipe runs.
Maximizing a complex, multi-angled attic space requires precise visualization to avoid creating a cramped environment. Incorporating professional design software or hiring specialists to draft updated home floor plans ensures that your doorways, furniture placements, and lighting schemes are completely optimized for traffic flow before construction begins.
Managing Climate Control and Ventilation

Tackling the Hot Attic Syndrome
Because heat naturally rises through a house and solar radiation beats down directly onto a roof, attics experience extreme temperature swings. In the summer, an unconditioned attic can easily reach temperatures exceeding 130 degrees Fahrenheit, while in the winter, it can turn into a deep freeze. To make this space livable, you must move the thermal boundary of your home up to the roofline itself. This is best achieved by installing dense spray foam insulation or rigid foam boards directly between the roof rafters, sealing out external air and stabilizing internal temperatures.
Upgrading Your Heating and Cooling Systems
Do not assume that your home’s existing heating and cooling system can simply be tapped into to condition your new attic space. Most residential units are sized precisely for the original square footage of the home. Forcing your current system to pump air up to a third floor will likely burn out the blower motor, leave your attic perpetually uncomfortable, and starve the lower floors of conditioned air.
The most efficient and popular solution for attic conversions is the installation of a ductless mini-split system. These compact wall-mounted units provide highly localized heating and cooling via an independent exterior condenser, giving you precise temperature control over the attic without affecting the rest of the house. Budgeting properly for a dedicated HVAC installation ensures that your new space remains exceptionally comfortable and energy-efficient throughout every season of the year.
Bringing in Power, Light, and Plumbing
Mapping Out Safe Power and Lighting Layouts
Natural and artificial lighting are critical components in making a low-ceiling attic feel open and airy. Because windows are often limited to the gable ends of the house, you should consider installing skylights along the slopes to flood the space with daylight. For artificial lighting, recessed LED canister lights are the ideal choice because they fit flush inside the rafter cavities and do not take up any valuable vertical headroom.
From an electrical perspective, you must ensure that your existing electrical panel has enough available capacity to handle the electrical load of an entire new floor. You will need to install multiple general-purpose outlets, dedicated circuits, and interconnected arc-fault circuit interrupters to meet modern safety codes. Because working inside tight, insulated rafter spaces presents significant fire and shock risks if done incorrectly, it is critical to employ licensed electrical services to safely handle the subpanel installations and circuit routing.
Handling Subfloor Preparation and Soundproofing
The floor of a raw attic is designed to act as a ceiling for the rooms below, meaning it is built to hold up drywall, not the heavy, dynamic weight of walking people and furniture. Before any cosmetic finishes are installed, the joists must be structurally reinforced, often by “sistering” new, wider pieces of lumber alongside the existing ones to stiffen the floor and eliminate sagging.
Once the structure is stiffened, soundproofing becomes your primary concern. Every footstep or moving chair on an attic floor will echo loudly in the bedrooms directly beneath it. To mitigate this issue, you must build an acoustic barrier into your subfloor assembly. This typically involves packing the spaces between the floor joists with acoustic mineral wool insulation and applying specialized acoustic glue between layers of plywood subflooring to absorb both impact noise and airborne sounds.
Choosing the Right Flooring for a Top-Floor Space

Balancing Weight and Durability in Flooring Materials
When selecting a finish material for your attic floor, you must strike a careful balance between your aesthetic goals, structural weight limits, and acoustic needs. Heavy materials like solid stone tiles add an immense amount of dead weight to an elevated timber structure, potentially requiring costly foundation reinforcements below.
For homeowners who desire an elegant, timeless look that matches the traditional aesthetic of their lower floors, natural wood remains a highly sought-after option. Installing classic hardwood flooring provides a gorgeous, high-end finish that can be sanded and refinished multiple times over the decades. However, solid wood expands and contracts in response to changes in humidity, meaning your attic’s climate control must be impeccably maintained to prevent gapping or warping.
Evaluating Resilient and Low-Maintenance Alternatives
If you are transforming your attic into a high-utility space like a children’s playroom or an art studio, you may want to skip traditional wood in favor of materials that prioritize flexibility, moisture resistance, and ease of maintenance. Modern manufacturing has created synthetic options that deliver exceptional performance without adding excessive weight to your upper joists.
One excellent option is modern, high-density laminate flooring. This material uses a photographic layer topped with a clear, incredibly tough wear layer that mimics the exact texture and grain of natural wood while offering superior resistance to scratches and dents. For spaces designed to host messy crafts, small kitchenettes, or top-floor laundry setups, installing a high-quality linoleum floor provides an eco-friendly, naturally anti-microbial, and completely water-resistant surface that can be cleaned with a simple damp mop.
Finishing Touches: Walls, Paint, and Aesthetics

Brightening Low-Light Spaces with Color Psychology
The final aesthetic choices you make will determine whether your converted attic feels like a cozy, expansive sanctuary or a dark tunnel. The sharp angles and low vertical walls characteristic of attics create unique shadows that can make spaces look smaller than they actually are. To combat this, your color palette needs to be highly strategic.
-
Paint both the vertical knee walls and the sloped ceilings the exact same shade of crisp white or cream to blur the hard visual boundaries of the room.
-
Use a flat or matte finish on the sloped ceiling areas to prevent glare and uneven light reflections from skylights.
-
Apply a slightly higher sheen, such as satin or semi-gloss, on trim, doors, and built-ins to subtly bounce light around the darker corners of the room.
-
Introduce bold colors or dark wood tones sparingly, limiting them to low-level furniture or rugs to avoid overwhelming the space.
Knowing When to Hire Professionals for a Flawless Finish
Hanging drywall and finishing walls in an attic is vastly more difficult than working in a standard room. Instead of simple flat surfaces meeting at neat ninety-degree angles, an attic features a complex web of compounding angles, low collar ties, and tight spaces around skylights. Every single one of these angled joints requires precise cutting and immaculate taping and mudding to look seamless.
Poor drywall finishing or sloppy paint lines are amplified drastically by the raking light that streams in horizontally through the roof windows. Vetting and hiring established interior painting companies can save you from weeks of frustrating, physically taxing overhead labor, ensuring that your tricky sloped ceilings are perfectly smooth. When you are ready to bring the entire vision together, pooling quotes from comprehensive home renovation services allows you to manage the entire timeline efficiently, keeping your framing, plumbing, flooring, and finishing tasks moving forward in perfect harmony.
Converting your attic is an intensive journey that requires a thoughtful blend of structural engineering, spatial ingenuity, and design creativity. While the technical requirements—ranging from verifying headroom clearances and reinforcing floor joists to managing complex climate control—can feel daunting at first glance, the reward is unmatched. You are effectively capturing valuable, hidden square footage from within your home’s existing footprint, turning a once-forgotten storage space into a highly functional, beautiful, and private oasis. By meticulously addressing each phase of the planning and construction process, you can ensure a smooth renovation that enhances your daily living experience and provides long-term financial equity for years to come.